

We have liftoff!
The Falcon 9 rocket with the Dragon and payload bound for the international space station clears the tower.
After scrubbing the launch the previous night due to weather, everything was looking good in the lead up to the scheduled launch of Space X CRS-4 at 1:52 am Eastern time. Compared to last night when it had been raining as we stepped out onto the roof of the VAB now it was clear and cool...we could even see some stars! At over 500 ft tall the VAB offered an amazing view and I hope I can return during the day at some point.
With only 15 minutes until launch all of us photographers set up quickly, with all the lenses pointing toward the lit up launch pad 5.2 miles away. The last 10 seconds of the count down flew by and as soon as I heard ignition I started taking images. I watched the Falcon 9 clear the tower through the camera lens...it offered a great view and the flickering flames of the exhaust were mesmerizing. Several seconds after launch the sound hit, so loud the roof of the VAB shook and I could feel it in my soul. The crackling and power was just awesome, so at this point I put the camera away and just enjoyed the rest of the experience.
Ready and waiting for launch.
Ignition! The umbilicals start to separate and the Falcon 9 takes flight.
Taking flight
Falcon 9 and Dragon heading toward the ISS with a crew of mousetronauts.
Not bad for 5.2 miles away.
Up Up and Away!
NASA Television coverage of the September 21 launch of the SpaceX Dragon cargo craft on the company's CRS-4 mission to the International Space Station. The spacecraft's 2.5 tons of supplies, science experiments, and technology demonstrations includes critical materials to support 255 science and research investigations that will occur onboard the station.
Camera Stuff
Typically I use a lot of wide angle images for my nature photography, but I knew I wanted a really long lens for this launch... I wanted the Falcon 9 to be so close it felt like you could reach out and touch it. So I returned once again to Lens Rentals to find the gear to get the job done. After browsing through all of the possibilities I ended up settling on the 500 f/4 and a 1.4x teleconverter. I chose the 500 f/4 because it was long enough to get a good start (while also not overloading my tripod) before adding any augmentation and fast enough that even when the teleconverter increased the minimum aperture one stop. It would still be able to shoot with a high shutter speed and wider aperture for a night launch. Major thanks go out to Lens Rentals for this one, after I placed my order they called me up and helped me ship it directly to Florida instead of LA. This saved me over $100 in rental costs and a ton of space in my camera bag - especially useful since there is no way in heck I would check a lens like this when flying.
Now that I had the equipment - I needed to get the shot. Being the first rocket launch I photographed I ended up asking a bunch of people for input, big thanks to all the photographers at Spaceflight Insider as well as Craig Bailey for steering me in the right direction. It was much brighter than I anticipated so would have over exposed. Once the launch started I clicked away until the buffer was full. I was also grateful for the fast shutter speed because the light breeze on the roof was causing lots of movement in the lens, see the video below for an example. Not what you want if your looking for sharp images!
The settings: f/5.6 1/640 second ISO 640 at 700 mm with Nikon D800 and a cable release.
Tools of the trade. Nikon D800 with Nikon 500mm f/4 lens and a 1.4x teleconverter making it 36 MP at 700mm f/5.6 for tonight's launch! I-Phone for scale.
Camera shake from a light wind using a Nikon D800 and Nikon 500mm f/4 lens with 1.4x teleconverter. Launch of the Space X Falcon 9 CRS-4 Mission.
Ready and waiting.... T-6 minutes and counting.
What an amazing day yesterday and today was looking even better. We started with more briefings by NASA administrators and then the SpaceX Preflight brief. The only concerning statement was that weather was looking iffy and they were predicting a 50% chance of scrub. Unfortunately we got the unlucky end of that 50% and the launch was postponed, but the rest of the day was amazing.
Space X Pre launch brief.
Hans from Space X
The Space X Launch Pad Tour
We got to visit the CRS-4 launch pad just before the Falcon 9 was transitioned to vertical. The remote cameras were being set up with audio triggers to catch the launch and the rest of us just enjoyed the view.
A view of the Space X pad with the Falcon 9 on its side.
Dragon capsule
Remote Cameras
The upper half of Falcon 9.
Falcon 9
Close up of features on the side of the rocket.
Delta IV Horizontal Integration Facility
We also stopped at the United Launch Alliance (ULA) vehicle assembly building. The Delta IV they were prepping for launch will be used on the December 4th launch to test the Orion capsule. The facility has one of the flattest floors in the world with only 3/8ths of an inch variation over the entire surface. (the nature photographer in me needs to point out that if the Delta IV HIL has an average variance of .00125 inches per foot then we should compare it to one of the flattest natural locations, the Racetrack Playa in Death Valley which has an average variance of only .0001 inches per foot.... gravity wins!) Lots of selfies were taken in front of the main engines.
Delta IV Heavy right engine.
Delta IV Heavy left engine.
Delta IV Heavy engines
Launch Pad 39B
Amazing to get the chance to walk around for 30 minutes on launch pad 39B. They are in the middle of retrofitting it for the new clean pad concept, where all of the rocket support structure will be wheeled out with the rocket to reduce set up time. Its wonderful to think of the history here, all of the Space Shuttle and Apollo launches that had there starting point from this landmark.
Liquid Hydrogen Tank
Abstract image of the flame scarred bricks in the flame trench.
One of our guides. Craig was a payload safety engineer for over 110 Space Shuttle launches!
Kiri wanting to press All The Buttons!
Next to the flame trench - Pad 39B
The crawlerway up to pad 39B
José was our guide on the launch pad, he is in charge of retrofitting it back to the clean pad functionality.
The famous countdown clock with the VAB in the distance.
Today started by getting our press badges and then driving into the Kennedy Space Center (KSC). It was a foggy morning and watching the Vehicle Assembly Building (VAB) slowly appear out of the mist was inspiring. KSC has so much history and has seen so many momentus achievements just being here gives me goosebumps.
The RapidScatt Panel
The morning was spent in a series of conferences about the experiments being sent up to the ISS on the CRS-4 mission. The first panel was about the RapidScatt module being attached to the Columbus module of the International Space Station (ISS). The RapidScatt, which was built by JPL, will allow around the clock observation of ocean winds as the ISS orbits. This is a long awaited opportunity to learn about rapidly changing weather patterns since it takes much more frequent readings of a given area than any past satellites. This capability will allow scientists to image hurricanes during their critical formation phase leading to a better understanding of their creation and allow for more accurate path and strength predictions. Another benefit of this scanner is that the ISS orbit overlaps with several other polar orbiting weather satellites, so researches will be able to cross calibrate the sensors leading to overall more accurate data. Once the Dragon capsule docks with the station installation will take only a few hours and calibrated data should be available to NOAA within 30 days.
Space bound 3D printer!
What could possibly be cooler than 3D printing? 3D printing in space!!! This amazing additive manufacturing experiment is also being sent up on CRS4 to run the first complete microgravity build tests. They have done trials in the vomit comet, but that only provides 20-30 seconds of build time before gravity returns. So seeing how an entire build handles microgravity and what sorts of changes to material properties that result will be very interesting. The first printed pieces will be tensile and compressive test coupons built from ABS plastic, which will be compared to Earth printed samples and run through a series of ASTM tests. Didn't get to peek under the hood, but in looking through the clear build ports (so they can record the builds) it looks like a standard ABS style printer. Screw drive on the platform and the casing is machined aluminum...looks like you could drive a truck over it and it wouldn't mind. The extruder head wasn't installed, but the build platform looked like it was heated. If the initial tests go well they are already planning a follow up printer that can use more robust materials....hopefully metals and coatings so they can print fully functional parts in orbit. One benefit of printing it in orbit is you don't have to withstand the launch strains, so most of the weight can be removed. This is a really interesting experiment and I look forward to following their progress.
The technology panel.
The space 3D printer showing its sexy side.
Lots of questions for the panelists.
Next on the agenda was golf clubs. Golf clubs? In space? Turns out the golf club company Cobra Puma Golf is doing an electroplating coating test to see how microgravity affects the growth of crystals in coatings (in this case silver plating on an aluminum substrate). Potentially an improved bond or coating strength could increase overall strength, reduce galvanic corrosion, improve durability, assist in joining dissimilar materials, and lead to coating additively manufactured materials in space (yay more 3D printing!). I'm really impressed with this firstly because its awesome science and as an engineer with background in single crystal alloys and coatings I like the field....and also because for a company to have the vision and foresight to actually pay to put research in orbit....thats just astounding. I'm sure as many of you in corporate America can attest, its hard enough to get post it notes most days. So what would you boss say if you asked to put something on the ISS? Yeah thats what I thought.
The biology panel.
The third and final panel of the morning was to showcase the biology experiments being flown on this mission. Bound for the ISS are 30 fruit flies, 20 mice, and a bunch of yeast. They expect around 6000 fruit flies on the return trip, but still only 20 mice (they are all female). Lets hope the fruit flies don't escape into the station.
I feel small.
After lunch we had a bit more time with some of the panelists for questions, and then started off to the VAB! Always having seen it from a distance I was giddy as a schoolgirl at the opportunity to go inside. It did not disappoint, it was HUGE. Perhaps its a Tardis...bigger on the inside? 456 ft high, with a volume that would take 250 billion ping pong balls to fill, and the largest doors on the planet....its the VAB. When condensation forms on the roof it feels like its raining.
One of the times when the image just doesn't do it justice. Though one of the fellow NASA Social participants was filming for Jaunt, which will provide this as a 3D immersive environment for Oculus Rift...... check it out and look for me over your left shoulder as you take in the view.
Now thats a building. The yellow gantry crane undergoing maintenance on the ground can lift 325 tons. Theres also 45,000 steel beams in this photo, can you count them all?
Looking back towards the "little" doors. NASA Social participants in the foreground.
NASA is punny. "Why does NASA throw a good party? --- They know how to planet"
Wow...just wow. The folks here at the Kennedy Space Center (KSC) have outdone themselves with the Atlantis exhibit. It is nothing short of phenomenal, although as an extreme space geek I am likely a bit biased.
Atlantis is housed in its own building, its easy to spot with the SRB and main tank stack sitting out front. Once you enter there are two films, one with background on the Space Shuttle program development up to the first launch. Then film two is in a second room with a great IMAX style wrap around projection. There is some great mission video and then the big reveal..... I won't spoil it for you but its awesome and very well done. Might have brought tears to my eyes, but I will never confirm it.
Transporting the audience through time and space....back to when the Space Shuttles flew.....
And there she is......

The last landing of Atlantis.
Atlantis. Mounted on her side with the bay doors open and Aurora on a projection screen behind. 33 missions over 26 years carrying 207 astronauts 126 million miles over 307 days in space.
I stood in awe and studied the details for the rest of the afternoon. The docent Mike, who used to be Director of Center Operations at KSC, was rather amused I think that I was there for nearly four hours, time flies when your having fun I suppose.
Surrounding Atlantis are a plethora of interactive and interesting exhibits on the Space Shuttle program, the International Space Station (ISS) and the Hubble Space Telescope. Even a re-entry slide and some mission simulators. There is really a lot to do and see here and no offense to the California Science Center where Endeavor is housed....but this blows that exhibit away. Its definitely a must see if you are anywhere on planet Earth and have a love of space.
Detail image of the crew hatch with rescue instructions. Thats NASA, safety first.
The harsh realities of space flight can be seen on the forward RCS thrusters.
Another view of the forward RCS thrusters.
The thermal blankets around the main engine gimbals was for acoustic dampening. The final attachment threading was all sewn by hand. Thank you to Jean for sharing all this wonderful information.
Detail image of small aft thrusters.
The viewing platform wraps around the orbiter offering great views. The doors are too fragile to open in Earth gravity so were supported by cables to prevent damage.
Detail image of the gimbling main engine mounts on the back of the orbiter. Amazing technology in this image, panels capable of handling thousands of degrees on re-entry, engines with internal temperatures reaching 6000 deg F, computer controlled thrust vectoring to ensure stable flight on launch. With over 2.5 million parts, the Space Shuttle truly is an engineering marvel.
Thermal blankets over the OMS engine pod. The blankets were hand stitched together to prevent fraying around the edges from aerodynamic buffeting.
Space Shuttle Main engine, the pattern of inlets help reduce stress on the nozzle.
As I prepared for my two week trip to Iceland I new I wanted to bring a good camera bag for hiking. I had a standard backpack style bag from Think Tank and it was OK for hauling my gear around town. When I did hiking based trips I just took my standard frame pack and wrapped the camera in a jacket or something.
The Tilopa BC in action at the Jokulsarlon glacial lagoon.
Fresh out of the box!
But it for Iceland I was going to be hiking every day and wanted something more convenient and comfortable. The current bag was hard on my shoulders and really hated the front entry. Having to brush off dirt and remove cactus prickers before putting it back on gets old really quick.
After doing lots of research I decided on an F-Stop Tilopa BC Bag. With a 48 liter capacity it's big enough that I can pack a days or overnights worth of gear in, has back entry, internal frame, good waist straps, room for a hydration bladder, and I liked the internal camera unit (ICU) system.
Price. No doubt about it, these packs are not cheap. I felt the cost of the external pack was fair, but I'd really like the ICU's to be cheaper. For what you get they seem overpriced, perhaps it's a production volume issue.
Getting the shot at Gullfoss.
Travel: I've now taken this pack on 8 different flights, both domestic and international, and had no trouble getting it onto the plane. Though some US carriers are now being quite stringent with carry on size no one gave the backpack a second look, even when they were stopping people with roller bags. I didn't have it completely full and no guarantees you can always slip it on-board though. Once on the plane it fit into the overhead bins no problem, and I was even able to stow it perpendicular to the aisle.
The Tilopa fit into the overhead bin with room to spare.
Packing for the flights I carried all my camera gear (D800, 4 lenses, NEX7), some books, laptop, and several spare hard drives with room to spare. I currently have the medium sloped ICU.
Waiting to board.
Waterproofness: So the F-Stop Tilopa BC is advertised as water resistant, and boy did I put it to the test. I had the bag out in 5 straight days of rain and it never leaked. This wasn't some delicate light drizzle by the way, but full blown drenching with horizontal blowing rain....for days on end. I'm sure like all waterproof coatings it will degrade over time, but compared to other outdoor gear I have used this really impressed me. On par with the best shell layers I've used.
The Tilopa resting on an iceberg. Jokulsarlon Iceland.
Another inadvertent waterproof test was at the Jokulsarlon iceberg beach, a rather large wave surprised me and the pack which I thought was a safe distance up the beach actually was within the waves reach. It was hit hard enough to pick it up and move it a bit, didn't leak at all, much to my relief and the relief of all my camera gear.
Comfort: I wore this pack on numerous short hikes, and several 6+ hour hikes in technical conditions (glaciers). When maneuvering on the edge of a cliff, on a slippery trail, or walking next to a crevasse I really want my pack to move like its part of me and the Tilopa didn't let me down. I can tell it was designed by people who actually spend a lot of time in the outdoors. It ranked equal in comfort to my two standard mountaineering packs, 40 L and 65 L standard frame packs. The fact that the camera is down low really helps with the weight distribution and the straps help keep everything snug.
The F-Stop Tilopa on a mountain on the edge of the Langjokull glacier, central Iceland.
Easy to adjust all the straps, really comfortable waist belt, and easy hydration bladder access. My only nitpicks are that using the sloped ICU, my 24-70 lens while stored upright occasionally poked me in the back through the padding. This was only an issue when I had the ICU padded cover tucked back for faster gear access. Also the shoulder straps tend to flop in the way of opening the back sometimes and that was annoying when I had been up for 20 hours during those never ending sunsets.
Technical: So in addition to the standard hiking I took this pack on one solo mountaineering climb and 3 day long glacial hikes. I chose the smaller ICU so I would have room for all of the gear you need on a more technical trip, and the medium sized ICU was perfect for those day trips. The bag had enough space for the 10 essentials, extra layers, hydration bladder, food, all my gear, tripod, crampons, ice axe, etc. For an overnight trip I would get the smaller ICU to have room for a tent and sleeping bag.
Roped up and on ice! One of the few days where it didn't rain...... Photo credit: Roger Kuhns
The Tilopa handled itself well, held up in the snow, didn't mind being thrown around or dragged, certainly didn't mind the wet. Lots of straps for almost any configuration, and the only time I found myself lacking the strap I wanted was when I went to stow my ice axe. It didn't have the little loops at the bottom which most bags have which are perfect for looping the axe head through. I tried with the elastic straps the Tilopa has there instead but they kept pulling out and the plastic end stopper popped off 3 times that day.
Finally some sun! Hiking with the Tilopa. Photo credit: Roger Kuhns
On a professional level I spent one day shooting on assignment at the Vatnakojull glacier and I felt under a lot of pressure to deliver the high quality images the customer needed. On ice in a hazardous location where mis-steps could be fatal (or at least hurt a hell of a lot) I really hate it if I have to worry about my equipment. I didn't have to worry about the Tilopa at all and that's a testament to its quality. I'm very pleased with its performance.
Conclusion: 4.5 out of 5 stars. I really love this pack, its the best camera bag I've ever had the pleasure of owning and I'm thrilled with F-Stop for making it.
Want to read more about my trip and see additional photos? Check out the blog posts and the Fire & Ice Gallery linked below!
Part 1
Part 2
Part 3
More Iceland Images
The F-Stop overview of the Tilopa BC from YouTube.
Day 3 Continued
After watching the jet skiers run around the lagoon and go swimming in their dry suits, I set off for a hike to see what I could discover. It was beautifully peaceful. Storms in the distance yet completely still along the shore, the occasional bird or seal swimming by. I'm not sure how long or far I wandered, it was just perfect so I enjoyed it without thinking about time. That's one wonderful benefit of it never truly getting dark, I did not have to hurry with my photography.
Click to Enlarge: Storms over the lagoon.
Click to Enlarge: Enjoying the view.
Wandering back towards the car I started seeing lots of people... which was strange; I hadn't seen lots of people in days. Turns out it was a photo workshop and I stopped to chat briefly with Marc Muench and Skarpi, which was really awesome. I have been wanting to meet them for years. Both were very nice, and I'm sure their workshop participants really had a good trip.
Click to Enlarge: Ice and the lagoon.
After a bit more exploring it was time to grab a little sleep and then get ready for the busy day I had planned tomorrow.
Day 4: Jokulsarlon and Skaftafell
Waking up around sunrise, I checked the cloud forecasts and decided to stick around the Jokulsarlon area. After some scouting around a bit to the north, I ended up back at the beach chasing iceberg photos. I tried for more intimate scenes and liked the way the waves were streaking over the black sands. It was a stormy morning and the light never developed, but the clouds were full of drama and I think it would take a complete white out to make this place unphotogenic.
Click to enlarge: Ice on the beach.
After enjoying the beach for sunrise, I grabbed a few hours of sleep and then started back to Skaftafell. I enjoyed a gourmet breakfast of cheese from the local gas station, then arrived at the Glacier Guides office for their afternoon glacier tour to the ice fall. There were four others on the tour and after all gearing up we headed out for an adventure. The walk in over the moss covered moraine was so beautiful; with the green, the mountains, and the ice it was like we were on another world.
Click to Enlarge: The beautiful hike to the glacier.
Click to Enlarge: Pointing out the route.
Click to Enlarge: On ice!
Click to Enlarge: Getting closer to the icefall.
Click to Enlarge: Hiking amongst the ice. The view of the green land below and ocean in the distance while being surrounded by ice was really interesting. Not something I'm used to seeing together, a very different experience than the Sierra's in California.
I really wanted to take some good photos of this trip and was surprised with the difficulty of doing so. A glacier isn't really a place to lose situational awareness, and I had visions of falling into a crevasse as I backed up to get a better angle on a shot. The guide also didn't want me wandering off for obvious reasons... I'm sure she didn't want to haul me out of a crevasse any more than I wanted to fall into one. The weather was constantly changing but the view from the top was breathtaking and I managed to set up a few images that I am happy with (like Hiking amongst the ice above). It was a great learning experience, and I was able to build on this knowledge on my two other glacier days later in the trip.
Click to Enlarge: Crevasse!
Click to Enlarge: Crossing the crevasse.
Click to Enlarge: Good day, good hike.
Happy but tired after the hike, I took advantage of the power outlet provided by the excellent staff in the Skaftafell visitors center to charge my laptop and back up my files. After the visitor center closed I wandered around the area looking for waterfalls. I hiked along a path and found several falls, but missed the best one at the end. I assume my fatigue played a part in this.
Click to Enlarge: The waterfall Hundafoss in Skaftafell National Park.
Eventually giving into my body's demands, I collapsed for several hours of sleep before the alarm went off to let me know sunrise was imminent. I had traveled farther up the coast towards the town of Hofn last night, but now looking at the clouds I regretted the decision. After a few critical minutes of indecision, I decided to drive as fast as safely possible while dodging sheep on the road, back to Jokulsarlon as it was right along the edge of the clouds. As I parked, the sun broke through and bathed the beach in a warm glow, the best sunrise I had seen in days. I ran the 200 meters to the shore and arrived to discover Marc's tour group was there and all the icebergs had photographers camped out behind them! Not being one to ruin anyone else's image by forcing myself in somewhere, I waited for a spot to open near these two icebergs I had my eye on. The sun was reflecting off the water and the ice to create a wonderful play of light and dark, warm and cold. The birds added an extra element and the fiery clouds were awesome. Despite being a bit out of position and late, I think the morning turned out well.
Click to Enlarge: Icebergs at Sunrise.
Finally pulling myself away from the Skaftafell region was hard. It was so beautiful but I knew other amazing places awaited. I drove up the coast towards Hofn where there is a very picturesque mountain that overlooks a tidal flat. I spent the rest of the day here. It was awesome dynamic light: clouds constantly moving and the sun intermittently breaking through. It was also very very windy, making it hard to get a reflection in the pools of water. It's hard to get an idea of how big the mountains are from the picture, but they were huge. I ran into a couple of surfers who were braving the cold water and small waves for some fun; they looked absolutely frozen when they got out of the water. They made me glad I was dry and wearing a wind proof coat!
Click to Enlarge: Mountains near Hofn Iceland.
As the evening wore on, I packed up and started the long drive back to Reykjavic to meet up with my sister who was flying over for the weekend. I was also driving back into a huge storm system and would spend the next several days in the rain. As the farms slipped by, I had to make one quick stop for a sheep picture because the scenery was gorgeous and I felt with so many sheep around I needed at least one picture of them during the trip.
Click to Enlarge: Because you know.......sheep.
After an amazing first day exploring Iceland it was time for....
Day 2
The first thing I did when I woke up was check the weather, Iceland has an awesome weather website and shows predicted cloud cover for up to 5 days out. Along with the photography map it was a great resource for planning the days travels. The cloud forecast on day 2 showed the West side of the island clearing, with storms moving towards the Eastern coast, so I started off East along highway 1.
My first stop was the wonderful waterfall Seljalandsfoss.
Click to Enlarge. Seljalandsfoss and rainbow.
As I continued to drive east along the coast the light just kept getting better and I had to repeatedly stop and just photograph whatever was around.....the road....rainbows....farm houses....sheep..... Simply couldn't pass up such good light.
Click to Enlarge. An amazing light show along the edge of the storm. Southern Iceland.
For sunset I decided to check out the black sand beach at Vik. The light was very soft and pastel, and the ocean a wonderful blue. Small waves so not to much drama, the scene was very peaceful and I wanted to capture that in my images. I was a little (ok a lot) tired at this point so when I parked and looked at the beach there was a river between me and it. Being all prepared, even though I was only a boyscout for 2 weeks, I had waders with me. So I got them on and waded across the river with my camera. On the far side I came across some locals who asked why I didn't just use the bridge while pointing upstream. Apparently I was quite tired.
The photography was wonderful and afterwords I enjoyed a freeze dried dinner while watching sunset slowly fade over the mountains.
Click to Enlarge. The black sea stacks at Vik.
Day 3
After a quick rest I continued driving East along hwy 1, determined to make it to the Jokulsarlon glacial lagoon and beach for sunrise. I think I saw perhaps two other cars on the drive, and it was quite uneventful with just the glacial out wash deserts to see in the edges of the headlights.
I made it to Jokulsarlon around first light and it was a beautiful sight. The lagoon was jam packed with ice, and there were large chunks washed up on the beach nearby. Eager to get started I hopped up on one of the big icebergs and enjoyed sunrise while I rocked and creaked underneath me. It was a calculated risk and I knew I would likely get wet in my return to shore, but it was worth it and thankfully the ice held me. The sunrise lasted long enough that the two pictures below are on the same morning about 30 minutes apart. I chose a wide angle lens to capture the grandeur of the scene. The beauty was almost overwhelming and the scene felt a bit like a dream.
With the tide coming in I eventually splashed back to shore and collapsed in the back of the car.
Click to Enlarge. Iceberg Dawn at Jokulsarlon.
Click to Enlarge. Icebergs in the surf at Jokulsarlon.
Tired out from iceberg hopping, I slept most of the day and woke up to a commotion along the shore of the lagoon. There were some people trying to maneuver a power boat and two jet ski's through the dense ice and into the lagoon. Jumping in and out of boats and around the icebergs to push them around....sometimes falling in (while wearing dry suits). After 30 minutes of effort they were eventually able to get the boat into clear water and pull it ashore. Talking to them after it turns out they had just completed a jet ski tour all around Iceland, they had done it in segments totaling 10 days on the water. Sounds like an amazing trip!
Click to Enlarge. Maneuvering through the icebergs.
I just spent an amazing two weeks chasing the light around Iceland. It is an amazingly beautiful place and I cannot wait to go back - so much more to see! I wanted to share the story of the trip with you, hopefully you find it inspiring, useful, and a little funny.
Preparing for the Adventure
A two week photography expedition takes some planning, and I started preparing for this trip three months in advance. An excellent source was the e-book Forever Light by Sara Marino and Ron Coscorrosa. It helped me get an idea of the layout of the country, some must see locations, and recommendations on gear. I likely would have forgotten to bring my waders without their suggestion, and they came in quite handy on several occasions! It also contained excellent advice about bringing camping style food, which came in handy when pretty much all of the stores were closed due to my inverted schedule (midnight sun!).
As I decided to camp / sleep in the car for two weeks that meant I didn't have to worry about lodging, but that car selection was very important. I wanted to be able to travel on F-Roads (the dirt back roads) as well as have room to sleep, so I opted for a small SUV. After reading reviews of many companies and calling a few, I ended up settling on Reykjavik Rental Cars and got a Hyundai Santa Fe for ~$1350 for two weeks. (Thanks to Europe's use of periods instead of commas, the car was originally only $1.35.....but sadly for me they noticed the error and fixed it). The Santa Fe got the job done comfortably, the customer service was great, and my only complaint is how gas hungry it was; it really made me miss my Subaru's 30 mpg! If you travel to Iceland and rent a car, many places offer all kinds of premium insurance, such as coverage from blowing ash damage. This can add hundreds of dollars to the cost, and after reviewing the rental car coverage and discussing it with an agent, we determined that the credit card coverage would be able to take care of any damage... so that saved me a ton of money / provided some peace of mind.
Once in country, the photography map of Iceland that I ordered was my most used resource. Not only is a good map essential when exploring somewhere new, but this one has all the photo locations on it as well! It stood up to two weeks of random folding, was referenced several times per day, and is even water resistant. I'd recommend this as a must have resource for any photography trip to Iceland.
Day 1
The "days" on Iceland ended up blurring for me, as I was constantly chasing clouds, staying up all night, and all in all having no schedule whatsoever. So the days are all kind of relative here...
After picking up the car and sleeping for 6 hours, I set off to chase some clouds. Wandering through a series of roundabouts, I eventually made my way out of the city and towards Geysir. (during the roundabout wandering I accidentally activated the seat warmer in the car...not knowing how to turn it off while lost and trying to find a place to pull over was rather amusing) It's not a long drive, but I kept stopping along the way to admire the countryside so it took a while. Eventually I saw the geyser erupting in the distance and I knew I was close! The geothermal field is small, and tends to be crowded with tour buses during the day, but at 9 pm there were only a few other people around. The original Geysir is here, but doesn't erupt anymore since some kids threw a bunch of rocks into it. It's neighbor Strokkur though was erupting every 6 minutes while I was there, very impressive! It forms an amazing bubble right before it bursts and since it erupts so frequently, it is an excellent photo subject. I was able to play around with different shutter speeds to get the water exactly the way I wanted it.
The Strokkur Geysir erupts!
After spending not long enough with at Geysir, I headed just a few minutes up the road to Gullfoss, which at nearly midnight I had all to myself. Its a two tiered waterfall, and the lower path gets you up close and personal with both tiers. The lower falls thunders into a canyon and there was so much mist, the bottom dissolved into white. There were no clouds during my visit, so I focused on more intimate compositions which didn't involve the sky. There are so many possibilities with this waterfall you could spend a whole day here. It would also be amazing to see it in the winter.
After two hours of photographing I retired to luxurious sleeping quarters of the SUV and slept for a whole hour...
The powerful Gullfoss at twilight.
Awaking slightly rested, the light was still dim outside and it was back to the road in order to chase the clouds North. I was intending to take F335 to Hagvatan which is a tongue of the Langjokull glacier, but it was closed due to spring conditions, so instead I continued on hwy 35 toward Blafell mountain. After an hour of driving, I came to another road closure and so continued on foot. It was a wonderful 32 deg F outside with a light 40 mph breeze, so all the mountaineering gear I brought came in handy. Climbing a snow covered ridge, I walked towards the edge of the Langjokull glacier until I came upon an amazing looking frozen lake. Snow covered peaks and earth shadow were behind the lake, so I was entranced and set up to wait for sunrise. While waiting in the wind, I explored to stay warm and found a great patch of moss which had been distorted due to freezing, the green and black created wonderful sinuous shapes and the rising sun completed the scene.
I hiked back to the car smiling, my first day couldn't have gone better!
Sunrise exploding over the snowfield.
Ansel Adams made the diving board famous with his class shot Monolith, and ever since then many landscape photographers have made the difficult hike in Yosemite to the same location as sort of a pilgrimage. I first tried to reach this area two years ago, and we took a wrong trail and ended up cliffed out on the back side of half dome. So last week Jeff Mitchum, Jeremy Long, Dave Frank, and myself tried again.
"Mountain Man" Jeremy Long by Vernal Falls on the Mist Trail, Yosemite.
The group at the diving board, an impressive gathering at a really remote location!
It was a REALLY hard hike with 40 lbs of camera gear on our back, but we eventually made it there and back again. 17 miles, nearly 6000 ft of climbing, and 14 hours round trip. Jeff brought some really great peanut butter and chocolate brownies which helped revive us at the half way point. At the Diving Board we also ran into Josh Cripps and John DeGrazio who came running up a knife edge ridge, very impressive!
The skies were a flat grey, no dramatic light to be seen unfortunately, so the image I had envisioned has yet to be made. That only means one thing though, I will be headed back soon.....
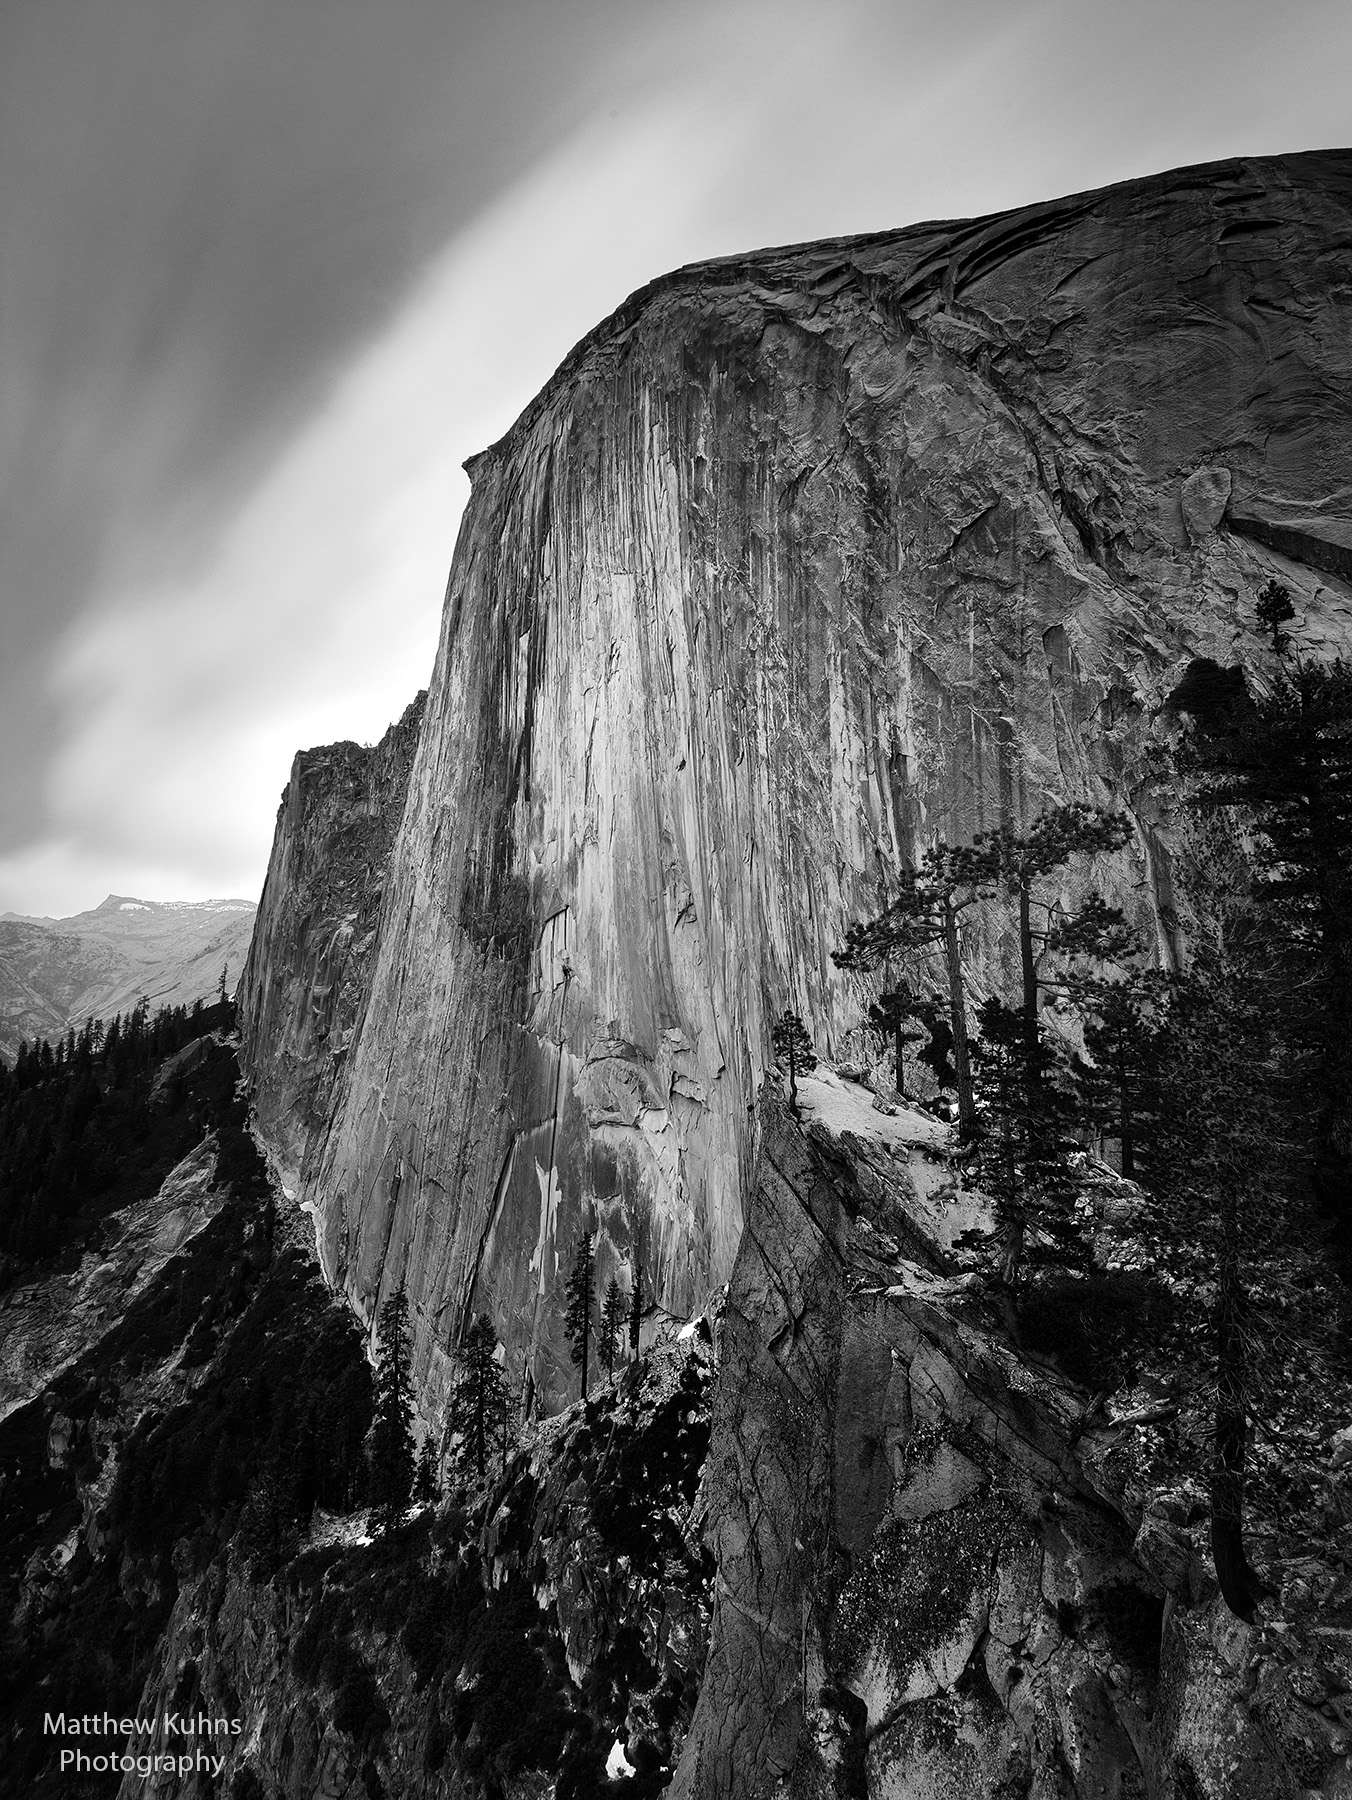
A cloudy day on the face of Half Dome
Peering over the edge.......
The view down, this is why they call it the diving board. (don't think I would jump without a parachute)